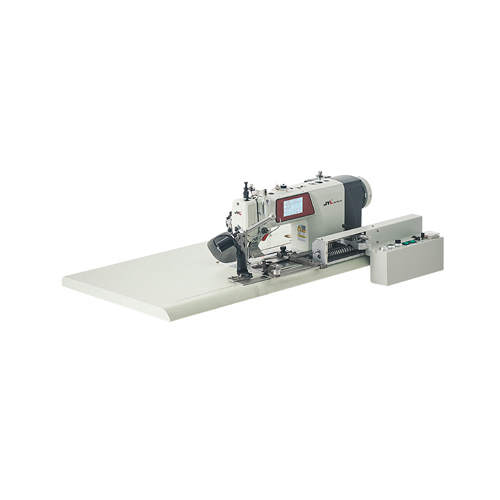
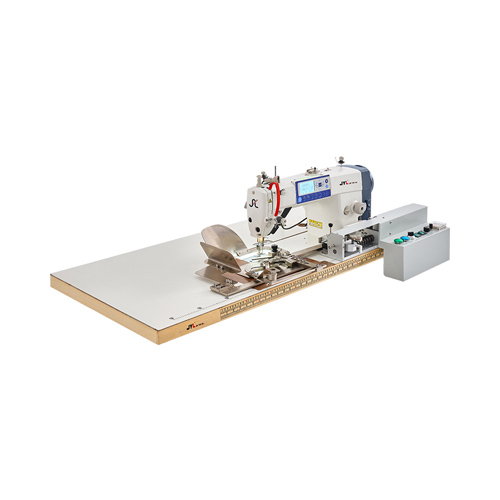
The Bucket Hat Sewing Machine (Model: JYL-PM-01D / JYL-PM-01P) is a fully automatic, high-efficiency hat stitching machine specifically designed for brim stitching in various hat types such as bucket hats, fisherman hats, Irish county hats, boonie hats, and session hats.
This industrial hat sewing equipment ensures precise and consistent stitching patterns, solving the common challenges faced by hat manufacturers: low efficiency, inconsistent stitching, and reliance on skilled labor. It’s ideal for factories looking to upgrade their production capacity while reducing costs.

Main Features
7.5 inch LCD Touch Screen Panel
Fast and intuitive interface for real-time pattern editing and operation.
Automatic Needle Positioning
Ensures accurate needle start for every stitch cycle.
Automatic Thread Cutting and Clamping
Saves time, improves efficiency, and reduces thread waste.
Broken Needle Detection System
Enhances safety and avoids damage to the hat or machine.
High Efficiency
One operator can run up to 23 units simultaneously.
Sturdy Jig with Turntable and Side Plates
Guarantees fabric stability and standard stitch alignment.
Voice Prompt Operation
Step-by-step voice guidance helps new users operate with ease.
Product Parameters:
| Model No. | JYL-PM-01D / JYL-PM-01P |
| Presser Foot Mode | Electronic/Mechanical |
| Sewing Speed | 3000 rpm |
| Maximum Stitches | 20000 stitches/pattern |
| Stored Programs | 1-999 patterns |
| Machine Size | 1200*540*730mm |
| Applicable Needle | DP*17 |
| Supply Voltage | AC 220V single phase |
| Weight | 75KG |
| Motor | 750W Direct Drive Servo Motor |
| Working range | maximum radius R135 |
Many manufacturers still use simple manual needles for stitching bucket hat brims, often resulting in uneven patterns and low production speed. With labor costs rising and skilled workers becoming scarce, switching to our automatic bucket hat brim Sewing Machine can solve these issues.
Key Benefits:
Consistent Stitching Quality
Every hat maintains a uniform and elegant stitch pattern.
Productivity Boost
Handle mass production with ease—perfect for hat factories.
Fabric Versatility
Suitable for all thicknesses and fabric types, including canvas, denim, and felt.
Low Labor Dependency
One person can operate multiple machines simultaneously.
High Precision with Japanese Machine Heads
Stability and accuracy for long-term industrial use.
How to Make a Bucket Hat with a Sewing Machine?
Want to create a bucket hat yourself? Here’s a step-by-step guide using a hat sewing machine:
Materials Needed:
Fabric (cotton, denim, or similar)
Matching thread
Scissors, pins, tape measure
Iron, ironing board
Bucket hat sewing machine
Step-by-Step Instructions:
1. Create or Download a Pattern
Measure your head’s circumference and add seam allowance. Define the desired crown depth and brim width.
2. Cut Fabric Pieces
Use the pattern to cut both outer and lining fabric pieces. Cut brim on the fold for a continuous shape.
3. Sew the Brim
Fold brim right sides together and stitch the curved edge. Clip seam, turn right side out, and press.
4. Sew the Crown
Join the crown panels, right sides together, and sew along the curved edge.
5. Attach Brim to Crown
Align brim with crown, pin raw edges, and sew. Use your bucket hat sewing machine for even stitching.
6. Add Lining (Optional)
Repeat the steps with lining fabric. Sew lining to main hat and leave an opening to turn it out.
7. Final Assembly
Turn hat right side out, press flat, and close lining seam with a hand stitch.
8. Optional Customizations
Add straps, eyelets, or custom branding.
FAQ
1. What types of hats is this sewing machine suitable for?
This machine is designed for brim stitching of various hats including bucket hats, fisherman hats, Irish county hats, boonie hats, and session hats. It excels in automated brim stitching with consistent pattern quality.
2. Is the machine difficult to operate? Does it require skilled labor?
Not at all. The machine features a 7.5-inch LCD touch screen with an intuitive visual interface. It also has voice-guided instructions, making it easy for beginners to operate with minimal training.
3. What are the key benefits of using this automatic sewing machine?
Fully automated: automatic feeding, pattern sewing, thread trimming, and broken needle detection
Consistent and elegant stitch patterns
High stability with Japan-imported machine head
One operator can manage up to 23 machines simultaneously
Supports up to 20,000 stitches per pattern and stores 999 sewing programs
Works with materials of varying thickness while maintaining stitch quality
4. What is the maximum sewing speed?
The machine operates at a high speed of 3000 rpm, ideal for bulk hat production.
5. Can it sew different patterns? Is it customizable?
Yes. You can store up to 999 customized sewing patterns, and easily edit or switch them via the touchscreen interface.
6. Can it handle thick or layered materials?
Absolutely. The machine handles cotton, denim, polyester blends, and other materials of various thicknesses with consistent stitching quality.


