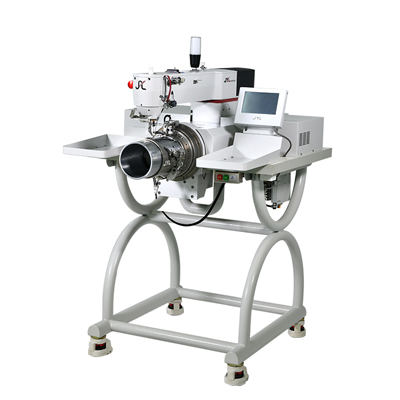
Sewing caps requires precision, patience, and the right equipment. However, even experienced sewists may encounter challenges such as fabric slipping, uneven stitching, or thread breakage. In this article, we’ll explore some of the most common problems encountered when sewing caps and provide practical solutions to ensure a smooth and professional finish.

1. Fabric Slipping During Sewing
Problem:
Caps are often made from slippery or flexible materials like polyester, cotton blends, or even leather. These materials can shift while sewing, leading to misalignment and uneven stitching.
Solution:
Use a walking foot or Teflon foot to improve grip on the fabric.
Secure the fabric with double-sided tape or fabric clips instead of pins, as pins can distort the shape.
Adjust the presser foot pressure to provide better control over the fabric.
2. Uneven Stitching
Problem:
Irregular stitches can ruin the appearance of a cap, making it look unprofessional. Uneven stitching often results from improper tension settings or inconsistent feeding of the fabric.
Solution:
Check the thread tension settings; adjust to a balanced tension where stitches are even on both sides.
Make sure to use a sharp, appropriate needle (e.g., a ballpoint needle for knit fabrics or a heavy-duty needle for thick materials).
Maintain a steady sewing speed and avoid pulling the fabric too hard while guiding it through the machine.
3. Thread Breaking Frequently
Problem:
Thread breakage is frustrating and can slow down the production process. This issue can be caused by poor thread quality, incorrect needle choice, or machine settings.
Solution:
Use high-quality polyester or nylon thread that is durable and suited for cap sewing.
Ensure the needle size matches the fabric type and thread thickness.
Clean the machine regularly, as lint buildup in the tension discs or bobbin case can lead to thread breakage.
4. Difficulty Sewing Curved Brim Areas
Problem:
Caps have curved sections, such as the brim, which can be challenging to sew without causing puckering or misalignment.
Solution:
Sew slowly and use shorter stitch lengths when working on curved areas.
Use a curved sewing guide or template to maintain accuracy.
Steam and shape the fabric before sewing to reduce resistance when guiding the material through the machine.
5. Needle Skipping Stitches
Problem:
Skipped stitches result in weak seams and an inconsistent look. This can occur due to an old or incorrect needle, improper thread tension, or issues with fabric feeding.
Solution:
Replace the needle with a fresh, sharp needle suitable for the fabric type.
Check that the thread is properly threaded through the tension discs and take-up lever.
Adjust the presser foot pressure to ensure even fabric feeding.
6. Puckering or Wrinkling Fabric
Problem:
Puckering occurs when the fabric gathers unintentionally, making the stitches look uneven or bunched.
Solution:
Use the correct stitch length—too short stitches can cause tension that leads to puckering.
Make sure the fabric is properly stabilized with interfacing or backing, especially for thin or stretchy materials.
Reduce the upper thread tension slightly to allow the fabric to lay flat.
7. Cap Fabric Getting Stuck in the Machine
Problem:
The fabric getting caught in the machine can cause damage to both the fabric and the machine itself.
Solution:
Ensure the feed dogs are clean and functioning properly.
Use a tear-away stabilizer underneath the fabric to provide extra support.
If the fabric is too thick, switch to a heavy-duty Sewing Machine designed for cap sewing.
8. Misaligned Embroidery or Logos on Caps
Problem:
When adding embroidery or logos to caps, alignment issues can make the design appear off-center or crooked.
Solution:
Use cap-specific embroidery hoops to hold the fabric in place.
Mark the placement area with fabric chalk or temporary markers before stitching.
Choose an embroidery machine with cap-friendly features, such as a rotating hoop or a specialized cap frame.
9. Fraying Fabric Edges
Problem:
Some cap fabrics, such as cotton or denim, tend to fray, leading to weak seams and an untidy look.
Solution:
Use overlock or zigzag stitches to prevent fraying.
Apply fray-stop liquid to the edges for extra reinforcement.
Use a serger machine if available to create clean and durable seams.
10. Difficulty Attaching Cap Panels Together
Problem:
Caps are made up of multiple curved panels, and stitching them together precisely can be challenging.
Solution:
Use notches and clips to align panels before sewing.
Stitch with a slightly longer stitch length to allow flexibility in fabric adjustment.
If necessary, hand-baste the panels together before machine sewing for better control.
Sewing caps presents unique challenges, but with the right techniques and tools, you can achieve professional results. By addressing common issues such as fabric slipping, uneven stitching, and thread breakage, you can improve the quality and efficiency of your cap-sewing projects. Whether you’re sewing custom caps for fashion, sports, or corporate branding, following these solutions will help ensure a smooth and successful production process.


