Introduction
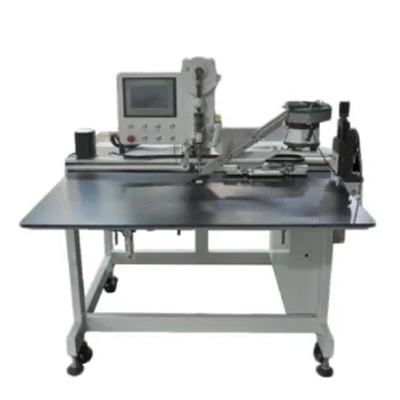
The Auto Nailing Stud Attached Machine is an advanced industrial tool designed for precision fastening of studs in various construction and manufacturing applications. This machine combines high-speed operation with exceptional accuracy, making it indispensable in modern fabrication processes. Below, we explore its technical specifications, applications, and maintenance procedures.
Key Features with Technical Data
Fastening Speed: Capable of 60-120 studs per minute, depending on material thickness and stud diameter.
Stud Diameter Range: Accommodates studs from 3mm to 12mm with adjustable collet systems.
Power Output: Delivers 1500W to 3000W of power for consistent penetration through various materials.
Precision Alignment: Features ±0.1mm positional accuracy with laser-guided positioning systems.
Material Compatibility: Works with mild steel, stainless steel, aluminum, and composite materials up to 6mm thickness.
Automation Integration: Equipped with RS-485 communication ports for seamless PLC system integration.
Noise Level: Operates at ≤75dB with vibration-dampening technology.
Energy Efficiency: Consumes 30% less power compared to conventional pneumatic systems.
Applications
The versatility of the Auto Nailing Stud Attached Machine makes it suitable for numerous industrial applications:
Construction Industry: For attaching studs to steel beams in high-rise buildings with M12 studs at 80 units/minute capacity.
Automotive Manufacturing: Used in chassis assembly lines for 5mm aluminum studs with cycle times under 2 seconds.
Shipbuilding: Installs corrosion-resistant 316L stainless steel studs on hull panels with 98% first-time accuracy.
HVAC Ductwork: Fastens mounting studs to 1.2mm galvanized steel without material deformation.
Electronics Enclosures: Precision attachment of M4 threaded studs for PCB mounting plates.
Prefabricated Structures: High-volume stud welding for modular building components at 100+ studs/minute.
Maintenance Procedures
Proper maintenance ensures optimal performance and extends the machine's service life beyond 50,000 operating hours:
Daily Maintenance
Inspect and clean the collet mechanism with isopropyl alcohol to remove metal particles.
Check air pressure levels (maintain at 6-7 bar) and lubricate pneumatic components.
Verify electrode alignment using calibration gauges (tolerance: ±0.05mm).
Weekly Maintenance
Replace carbon brushes when worn to <5mm length.
Test emergency stop functions and safety interlocks.
Lubricate linear guide rails with ISO VG68 grease.
Monthly Maintenance
Perform torque calibration on drive mechanisms (spec: 20±2 Nm).
Clean and inspect cooling fans for proper airflow (≥15 CFM required).
Check cable insulation for wear (minimum 1MΩ resistance).
Quarterly Maintenance
Replace filter elements in the pneumatic system.
Recalibrate positioning sensors using master alignment fixtures.
Inspect main bearing assemblies for wear (maximum play: 0.02mm).
Annual Maintenance
Complete dielectric strength test on electrical components (1500V AC for 1 minute).
Replace timing belts and verify sprocket alignment.
Perform full system diagnostic using manufacturer's software.
Troubleshooting Common Issues
Issue: Inconsistent stud penetration
Solution: Check power supply stability (±5% voltage variation allowed) and electrode wear (replace if erosion exceeds 1.5mm).
Issue: Misaligned stud placement
Solution: Recalibrate optical positioning system using grade 00 surface plate and verify mechanical backlash (<0.01mm required).
Issue: Excessive vibration
Solution: Balance rotating assemblies to G2.5 grade and inspect damping mounts for compression loss.